Training Videos
If you haven't watched our training videos yet, we recommend it. Otherwise the instructions below show you how to place the support tab/widget on your websites, blog and instructions to give to technical support for your online resources.
Placing the Widget Code on your Sites
We strongly recommend using the Support Tabs instead of the embedded widgets.
Why? It puts help on every page of your website, blog and online resources. It's the whole point of offering great customer service! You can place the tab/widget on multiple pages or a single page, just make sure the code doesn't appear twice on the same page.
Need details and info to your IT/Technical Support Team?
Visit our Copy/Paste Emails to Send to IT or Tech Support post for more helpful info. Need assistance? Use OUR support tab. ;)
CMS - Plugins for Drupal, Wordpress and Joomla!
Drupal Installation
The plugin download links are below, along with a few instructions from the Developer who created it.
When installing the module, module will install default values which should be enough for most sites (it excludes the script in admin pages, user and content edit pages, etc). After installed, simply enter your keyword and the support tab will load on your pages.
Drupal modules are typically distributed in ZIP and tar.gz formats, so links to each are below.
http://www.mosio.com/plugins/mosio_Drupal.zip
http://www.mosio.com/plugins/mosio_Drupal.tar.gz
============================================================================
Wordpress Installation
The plugin download links are below, along with a few instructions from the Developer who created it in the PDF (link below).
Click here and save the plugin to your computer where you'll be able to find it in a few seconds:
http://www.mosio.com/plugins/Wordpress-Plugin-Mosio-Support-Widget.zip
How To PDF with Screen shots:
http://www.mosio.com/plugins/Installing_Mosio_Wordpress.pdf
STEPS EXPLAINED:
1. Click Add New and Upload the Plugin to install.
2. Click "Activate" on the Plugin and enter your Mosio Keyword.
3. After installed, simply enter your keyword in the field, click Save Changes and the support tab will load on your pages.
============================================================================
Joomla! Installation
The plugin download links are below, along with a few instructions from the Developer who created it.
We recommend using the plugin for the support tab instead of the module.
When a module is published, on most templates, even if there is no output it will still reserve a blank space for the output. requires the user to publish the module and select which pages it should be on (or all if they choose). A module requires the user to publish the module and select which pages it should be on (or all if they choose).
The plugin has it's draw backs as well. If for whatever crazy reason your template doesn't include the [/body] tag, then it won't work, but that is very rare, and should only happen from a template that should be redesigned.
After installed, simply enter your keyword and the tab/widget will load on your pages (all pages if Plugin, select pages if Module)
DOWNLOAD LINKS
Joomla! 2.5 (should work in 3 as well)
http://www.mosio.com/plugins/mosio_Joomla_plugin_25.zip
http://www.mosio.com/plugins/mosio_Joomla_module_25.zip
Joomla! 1.5
http://www.mosio.com/plugins/mosio_Joomla_plugin_15.zip
http://www.mosio.com/plugins/mosio_Joomla_module_15.zip
============================================================================
Launching the Widget from Buttons and Links
Most libraries are able to add our widget code to their footer files or use our plugins for Drupal, Joomla! or WordPress, but others are using shared websites with their schools, cities, etc.
While we offer an embeddable widget, if you do not have the freedom to add the support tab to every page of your website, we suggest using one of our buttons and placing it everywhere you can.
We have instructions, code and groovy buttons you are more than welcome to use!
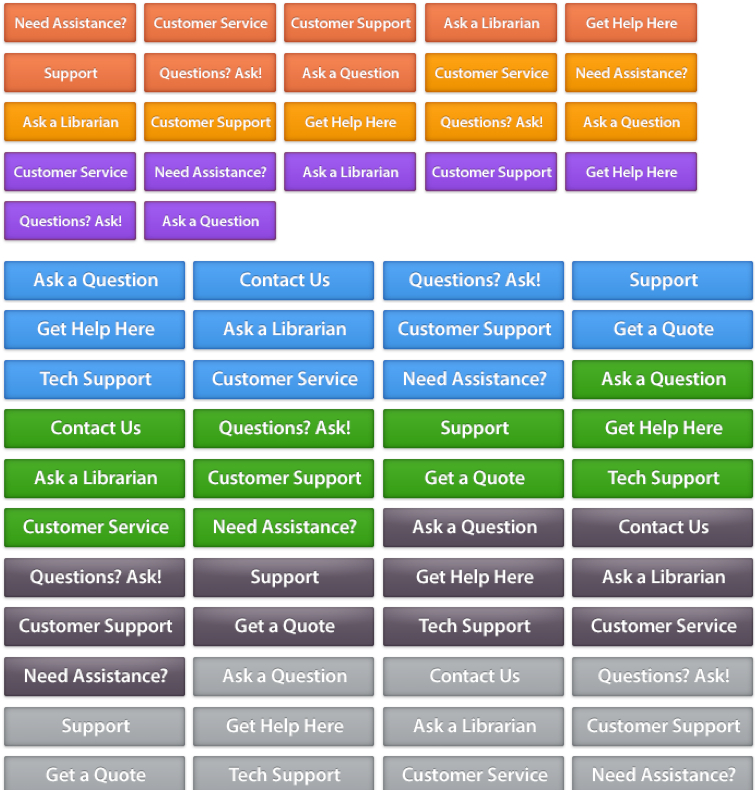
Get Started: Click Here for Instructions, Links and a Gallery of Buttons to Use
============================================================================
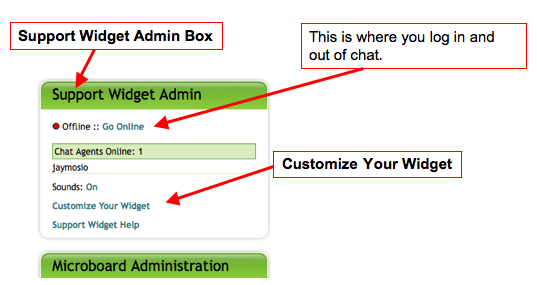
Chatting from inside your TAL microboard
When you are logged into your Text a Librarian account, you'll notice a Chat
module (see image) on the right hand side of your microboard. You can turn
chat on and off using this module, manage settings and in the near future,
control customization. The image shows what it will look like when you are
offline.
When you are online, patron chats will pop-up, and you will get a flashing
notification in the title bar of your microboard stating you have a new
chat.
Need help? Use our support tab/widget!
Please make sure and read the FAQ section below first.
FAQs
Support Widget/Tab Questions:
Do we have to update the widget/tab code to add the new features?
No! You place the code once and then we update the features auto-magically.
Can we customize the look and feel of our support tab?
Si! You can change the look and positioning of your Support Tab. Make your own or choose one of 70 in our
Support Tabs Gallery
Are we able to adjust where it is on the page?
Yes! See above.
Chat Questions:
Can we still be logged into our microboard and be logged out of chat?
Absolutely. You'll see the a chat module on the right hand side when you're logged in that will enable you to turn chat on and off.
Email Response Management Questions:
What exactly does Email Response Management mean?
It means you'll be able to receive and respond to emails from patrons efficiently. For reference or any other type of service.
Can patrons email us from the widget/tab?
Yes! They'll be able to type in a question and choose to be responded via email or text message.
Ready to get Started?